Before following along with this article please setup your Arduino for Johnny Five. The full setup guide is here
Johnny Five is a really cool framework that allows you to use Javascript code to control supported boards ranging from an arduino to a raspberry pi.
For Arduino the setup is pretty easy but the constraints are as follows:
The JavaScript program is executed on a host machine that runs Node.js. The program transmits basic IO instructions to the board via usb serial, which acts as a thin client. Requires tethering.
Which means your Arduino must be connected at all times to the host machine so that the code can run.
This is unlike the traditional method of upload and forget when using base Arduino.
Although this drawback can be mitigated by using a Raspberry Pi alongside the Arduino. But I want to use just the Arduino to do stuff using Javascript.
Thats when I found this link for using a HC-05 bluetooth module to act as a wireless serial port.
Although theres a number of things that the guide in the link omitted. Like where is the key pin on a HC-05.
And that you have to use a Bluetooth Manager to actually let the device be seen as a serial port.
Today I will explain to you how I set this up on my host computer running Ubuntu 18.04 LTS.
Its going to basically mirror what the guide has but with added content on whats missing.
Hardware Used
The base setup
So first off we need to send AT commands to the HC-05. In order for us to do that we need to do this connection:
with Bluetooth RX to PIN 11 and Bluetooth TX to PIN 10
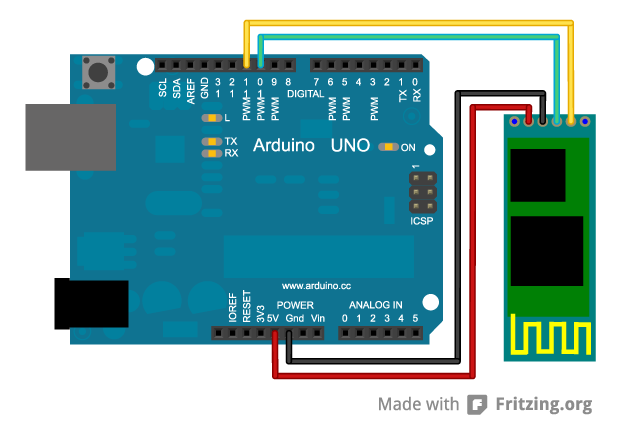
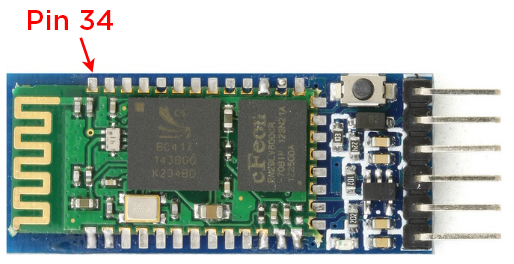
And also locate the KEY pin of the HC-05. This is important since this is where the code does its magic to send AT commands:
Then open up your Arduino IDE and stick this code in it.
Assuming you have done the required connection, run the code and quickly use a jumper wire to connect PIN 9 of your Arduino to the HC-05 KEY PIN. You have 10 seconds to do that.
After 10 seconds the TX LED of your Arduino should blink every second for 6 seconds.
If you’ve done this right you should see an output in your Serial Monitor similar to this:
Starting config
OK
OK[VERSION]
OK
OK
OK
Done!
Otherwise change the value of BLUETOOTH_SPEED in the code. In my case I had to change 38400 to 9600 since I formerly did stuff with my HC-05.
There should be no ERROR(0) shown in the Serial Monitor. If there is do the setup again.
Uploading the Firmata
Without changing any of the connections open another tab in your Arduino IDE and copy the code in this link
Then Upload as usual to you Arduino.
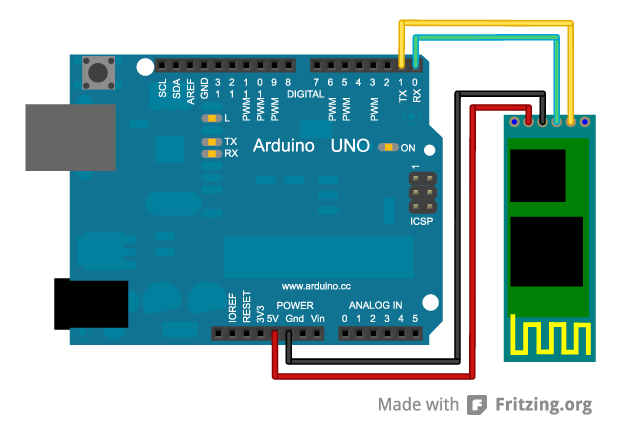
Changing the connection
Next setup this connection with Bluetooth RX to PIN 1(TX) and Bluetooth TX to PIN 0(RX)
For extra measure press the reset button on your Arduino for 11 Seconds.
Bluetooth in Host (Linux Only)
First in your HOST machine download blueman:
sudo apt-get install blueman
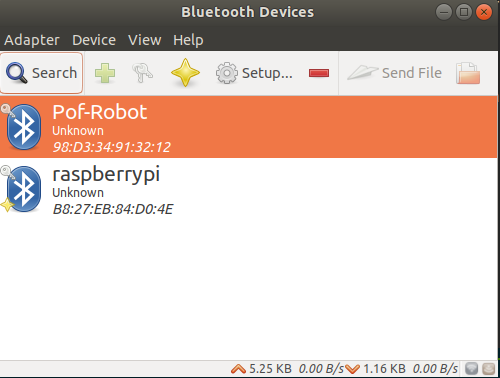
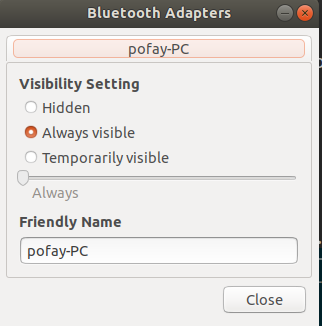
Then open blueman and you should see this window:
Click on Adapters –> Preferences and then set Visibility Setting to Always Visible
Then select the name of the HC-05 Bluetooth. Its what you set in the ROBOT_NAME during the AT setup. In my case its POF_ROBOT.
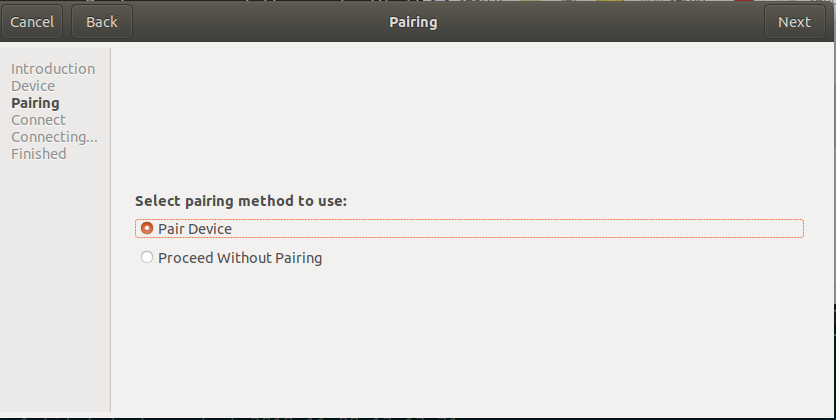
Then click setup and pair with it. The default pin should be 0000:
The most important part is the connection. Select the Serial Port option:
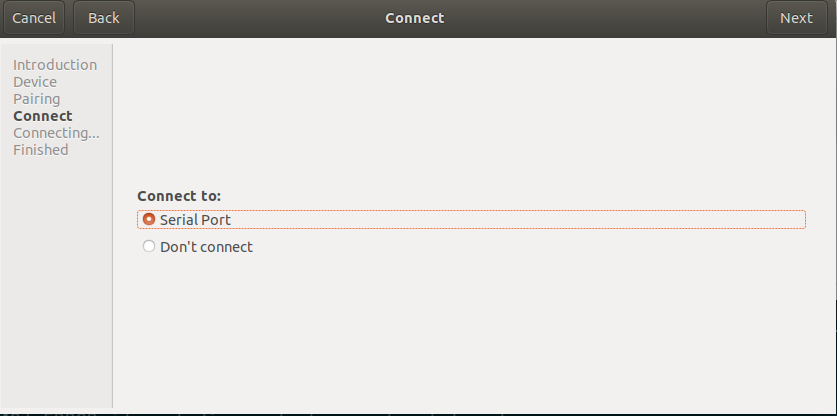
In Ubuntu 18.04 LTS and provided you didn’t switch to another desktop manager shortly after pressing next you should see a notificaiton telling that bluetooth device is now open in /dev/rfcomm#.
Usually in the first run it should be /dev/rfcomm0 unless you’ve got other bluetooth devices that are communicating over as a serial port.
Running some code
Run these commands:
mkdir j5
cd j5
npm init // Walk through the setup
npm install johnny-five
And then create a file called board.js with the following contents:
Remember to change the /dev/rfcomm0 if you’ve got other bluetooth as serial port devices connected.
The run using sudo node board.js. The LED in PIN 13 should keep on blinking until you press CTRL-C.
Notes: If it gives you a timeout error, press the reset button on your Arduino for 11 seconds. That should do the trick.
End
This is by no means an exhaustive guide, but rather on what I did to get HC-05 Bluetooth to work as a serial port in my case since the guide didn’t tell everything.
I hope you’ve learned something today. Happy Tinkering and Coding!
Comments